
Quick Summary: The LE error code on LG washers signals a locked drive motor or a communication failure between the motor and control board. In most cases, a faulty hall sensor (rotor position sensor) is the root cause — and replacing it yourself is a practical, cost-effective fix that avoids expensive service calls.
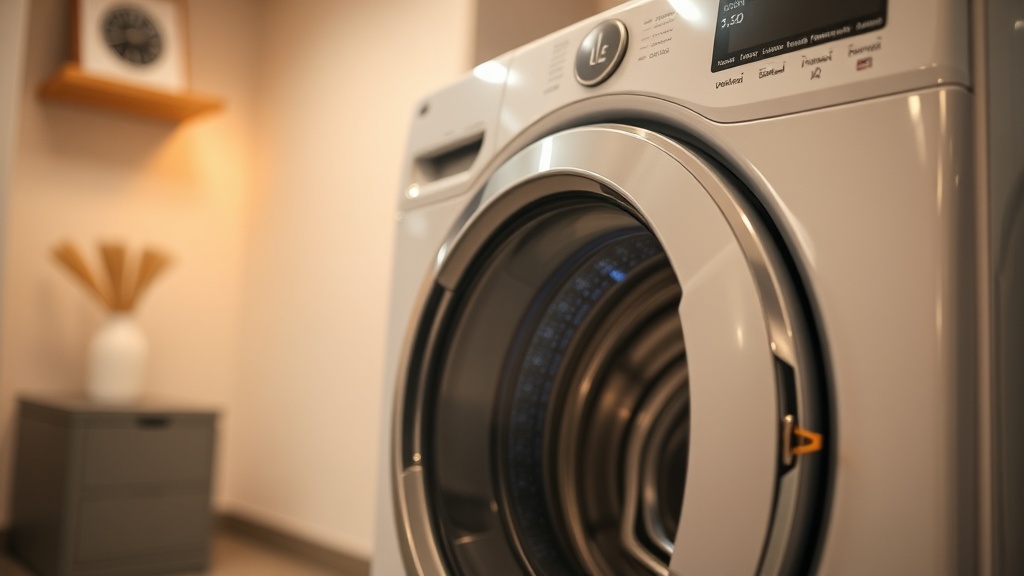
Few appliance failures are as disruptive as a washing machine that stops mid-cycle and refuses to restart. When your LG washer displays the LE error code, it is signaling a critical problem with motor communication — and understanding exactly what is happening under the drum is the first step toward a confident, lasting repair. This guide walks you through the complete diagnostic and LG washer LE error hall sensor DIY replacement process, from a simple reset to full component swap, using verified technical facts at every step.
What the LE Error Code Actually Means
The LE error on LG front-load and top-load washers indicates a “Locked Drive Motor” condition or a communication failure between the motor and the main control board, causing the appliance to halt the wash cycle immediately to prevent damage.
The LE error code is not a vague fault — it is a precise diagnostic signal built into LG’s direct-drive motor architecture. According to LG’s own support documentation, this code activates when the control board cannot confirm that the motor is rotating correctly within the expected parameters. The machine enters a protective shutdown to avoid burning out the drive system. While the symptom is a stopped machine, the underlying cause is almost always rooted in one specific component: the hall sensor, also known as the rotor position sensor.
It is worth noting that LG’s direct-drive motor technology, which eliminates traditional belts and pulleys by mounting the motor directly onto the drum shaft, relies entirely on electronic feedback for speed and position control. This makes the hall sensor the single most critical communication link in the entire drive system. When it fails, the entire motor appears “locked” from the control board’s perspective, even if the motor itself is mechanically sound.
The Hall Sensor: Primary Cause and Function
A malfunctioning hall sensor is the primary cause of the LE error in LG direct-drive washing machines. This small electronic component monitors the rotor’s speed and position in real time, allowing the control board to regulate drum rotation with precision.
The hall sensor operates on the principle of magnetic field detection. As the rotor spins, its magnets pass the sensor face, generating a pulsing electrical signal that the control board interprets as rotational speed and position data. This feedback loop happens hundreds of times per second during operation. When the sensor degrades — due to heat cycling, vibration fatigue, or moisture ingress — those pulses become erratic or disappear entirely. The control board, receiving no valid signal, concludes the motor is locked and triggers the LE fault.
“The rotor position sensor is the eyes of the direct-drive motor system. Without accurate position feedback, the inverter board cannot fire the motor windings in the correct sequence, making the motor effectively non-functional regardless of its physical condition.”
— Appliance Engineering Principle, Direct-Drive Motor Control Systems
According to Wikipedia’s entry on Hall effect sensors, these devices are used extensively in brushless motor applications precisely because they provide non-contact, high-frequency position sensing — which is exactly why they are the preferred technology in modern washing machine drives. Their reliability is high, but they are not immune to the harsh thermal and mechanical environment inside a washer cabinet.
Before You Open the Machine: Attempt a System Reset
A hard reset — unplugging the washer and holding the Start/Pause button for five seconds before reconnecting power — can clear a false LE error caused by a temporary control board glitch, saving you unnecessary disassembly time.
Not every LE error represents a physically failed hall sensor. Voltage spikes, power interruptions during a spin cycle, or a momentary communication dropout can latch the fault code in the control board’s memory without any underlying hardware damage. Before investing time in a full teardown, always perform a proper power cycle. Disconnect the washer from the wall outlet completely — do not simply press the power button — then press and hold the Start/Pause button for five seconds to discharge any residual capacitor voltage in the control board. Reconnect power and run a short Rinse and Spin cycle to see if the error returns.
If the LE code reappears within the first few minutes of drum rotation, the fault is persistent and hardware-level diagnosis is required.
Tools Required and Component Location
Replacing the hall sensor requires a Phillips head screwdriver, a 10mm socket for the stator bolts, and a 17mm socket for the rotor center bolt. The sensor itself is mounted directly on the stator assembly, located at the rear of the washer drum behind the rotor.
Having the correct tools assembled before starting is essential. The rotor center bolt on LG direct-drive models is secured at a specific torque, and attempting to remove it with an incorrect socket risks rounding the bolt head. The stator and rotor assembly is accessed from the rear of the machine, meaning the washer must be moved away from the wall and the rear access panel removed. No front disassembly is required for this repair, which significantly reduces the complexity compared to repairs on belt-driven machines.
Step-by-Step Hall Sensor Replacement Procedure
The replacement process involves removing the rotor bolt and rotor, unbolting the stator, inspecting the wiring harness, unclipping the old sensor, and installing the new unit — a repair that takes approximately 45 to 90 minutes for a first-time DIYer.
Follow these steps methodically, ensuring power is fully disconnected before any work begins:
- Disconnect power and water: Unplug the machine and turn off the water supply valves. Pull the washer away from the wall to access the rear panel.
- Remove the rear access panel: Use a Phillips head screwdriver to remove the panel screws and set the panel aside.
- Remove the rotor center bolt (17mm): The rotor bolt is threaded in the standard direction — counterclockwise to loosen. A firm grip on the rotor to prevent it from spinning while applying torque is essential. Some technicians use a rubber strap wrench for this step.
- Pull the rotor assembly free: The rotor slides off the motor shaft. It is heavy due to its permanent magnets, so support its weight as it comes free to avoid dropping it onto the stator.
- Unbolt the stator (10mm): Remove all stator bolts and carefully disconnect the wiring harness connectors. Note the connector positions before disconnecting — photographing them with a phone is a reliable reference method.
- Locate and inspect the hall sensor: The sensor is a small plastic component clipped onto the stator body, with a dedicated wiring loom running to it. Inspect the loom first for fraying or corrosion before assuming the sensor itself has failed.
- Replace the sensor: Unclip the old sensor, seat the new one firmly, and reconnect its connector with a positive click. Ensure the harness is routed away from any moving components.
Wiring Harness Inspection: The Step Most DIYers Skip
Frayed wires or loose connectors on the hall sensor wiring harness can fully mimic a sensor failure, causing a persistent LE error even after a new sensor is installed. Physical inspection of the harness is non-negotiable.
This is the most overlooked step in the entire repair process, and it is frequently the reason an LE error returns shortly after a hall sensor replacement. The wiring harness running from the stator to the control board passes through tight channels in the washer cabinet where it is subject to continuous vibration. Over years of operation, the insulation at flex points can abrade against cabinet edges, creating intermittent short circuits or open circuits that produce identical symptoms to a dead sensor. Run your fingers along the entire length of the harness, paying particular attention to any point where the wire bends around a bracket or passes through a grommet. Damaged sections should be repaired with proper electrical tape or heat-shrink tubing, or the harness should be replaced entirely.
Cost Comparison: Hall Sensor vs. Full Assembly Replacement
Replacing only the hall sensor is dramatically more cost-effective than replacing the entire stator or motor assembly, making it the recommended first-line repair for any LE error diagnosis.
As noted by repair industry sources, targeted component replacement is almost always the financially sound approach before escalating to full assembly swaps. The following table illustrates the cost difference across repair options:
| Repair Option | Estimated Parts Cost | DIY Difficulty | Recommended? |
|---|---|---|---|
| Hall Sensor Only | $10 – $30 | Moderate | ✅ First choice |
| Stator Assembly | $80 – $150 | Moderate | ⚠️ Only if stator is damaged |
| Full Motor Assembly | $200 – $400 | High | ❌ Last resort only |
| Professional Service Call | $150 – $350+ labor | N/A | ⚠️ If DIY is not viable |
As Consumer Reports’ appliance reliability data consistently shows, direct-drive washing machines have fewer mechanical failure points than belt-driven models — meaning when an LE error does appear, the repair is typically confined to a single, inexpensive electronic component rather than a worn mechanical part.
Final Reassembly and Verification
After installing the new hall sensor and reconnecting all wiring, reassemble the stator and rotor in reverse order, torque the center bolt to specification, and run a Rinse and Spin cycle to confirm the LE error has been resolved.
Reinstall the stator bolts evenly in a star pattern to ensure flat, even seating against the motor housing. Before installing the rotor, rotate it by hand to confirm it spins freely without catching on anything. Thread the center bolt in by hand first to avoid cross-threading, then torque it firmly with the 17mm socket. A loose rotor creates high-frequency vibrations that accelerate hall sensor wear and will cause the LE error to return within weeks. Reinstall the rear access panel, reconnect the water supply, plug in the machine, and run a short Rinse and Spin cycle as the verification test. Smooth, quiet drum rotation without the LE code is confirmation of a successful repair.
FAQ
What does the LE error code mean on an LG washer?
The LE error code on LG front-load and top-load washers signifies a “Locked Drive Motor” condition or a communication failure between the motor and the main control board. The machine halts the cycle automatically to prevent motor damage. The most common hardware cause is a failed hall sensor (rotor position sensor) on the stator assembly.
Can I fix the LG washer LE error without replacing any parts?
Yes, in some cases. A system reset — unplugging the washer and holding the Start/Pause button for five seconds before reconnecting power — can clear a false LE error caused by a temporary control board glitch. Additionally, inspecting and reseating the hall sensor wiring harness connectors can resolve the error if a loose connection is the cause, with no replacement parts needed.
Is replacing the hall sensor difficult for a beginner?
The repair is rated moderate difficulty. It requires a 17mm socket for the rotor bolt, a 10mm socket for the stator bolts, and a Phillips head screwdriver. The most technically demanding step is removing the rotor without dropping it onto the stator. With careful preparation, patience, and this guide, a first-time DIYer can complete the repair in 45 to 90 minutes.