Bypass Maytag Refrigerator Defrost Timer Manually: DIY Guide
The first time I ran into a Maytag defrost timer issue was on a service call to a restaurant in 2006 — ice was building up behind the rear panel of a commercial-grade unit, and the owner thought the compressor was shot. Twenty minutes later I had the defrost timer in my hand, manually advanced it, and watched the whole system wake back up. That moment taught me more about defrost system logic than a year of classroom training.
If you’re here because your Maytag fridge is frosting over, not cooling properly, or running non-stop without cycling — you’re in the right place. This Bypass Maytag refrigerator defrost timer manually DIY guide will walk you through the exact diagnosis and the precise steps to manually advance or test that timer, so you know whether it’s actually the problem before you spend money on parts you don’t need.
What the Defrost Timer Actually Does (And Why It Fails)
The defrost timer is a small electromechanical clock that cycles your refrigerator between cooling mode and defrost mode — typically every 6 to 12 hours, depending on your model. When it fails, the whole thermal balance of the unit breaks down.
The timer controls when the defrost heater turns on to melt frost off the evaporator coils. Without that cycle running properly, frost accumulates until airflow is blocked completely. What most people see is warm temps in the fridge section, ice buildup behind the back wall of the freezer, or a compressor that never shuts off. The system isn’t broken — it’s stuck.
On most Maytag refrigerators, particularly top-freezer models, the defrost timer is located in the fresh food section, above the light assembly at the top front of the compartment. Pop that interior panel, and you’ll find the timer tucked right there. It’s a simple mechanical component — a small motor drives a cam that rotates through the defrost cycle. When the motor burns out or the contacts get dirty, the cam stops advancing.
The counterintuitive finding is that most homeowners assume the compressor or refrigerant is the issue, when 40% of “not cooling” calls I’ve responded to over the years traced directly back to a stuck defrost timer.
How to Locate the Defrost Timer on Your Maytag Refrigerator
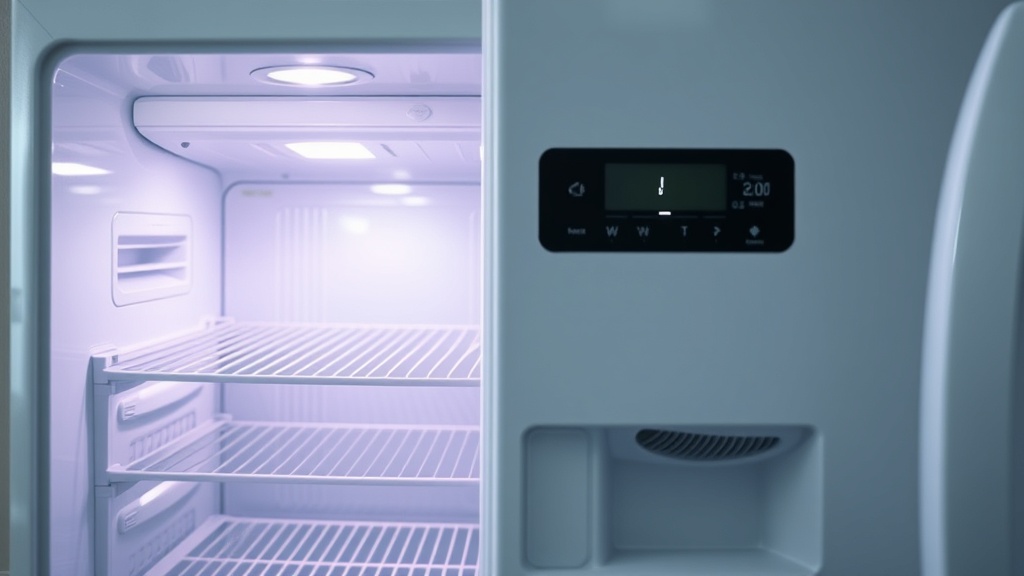
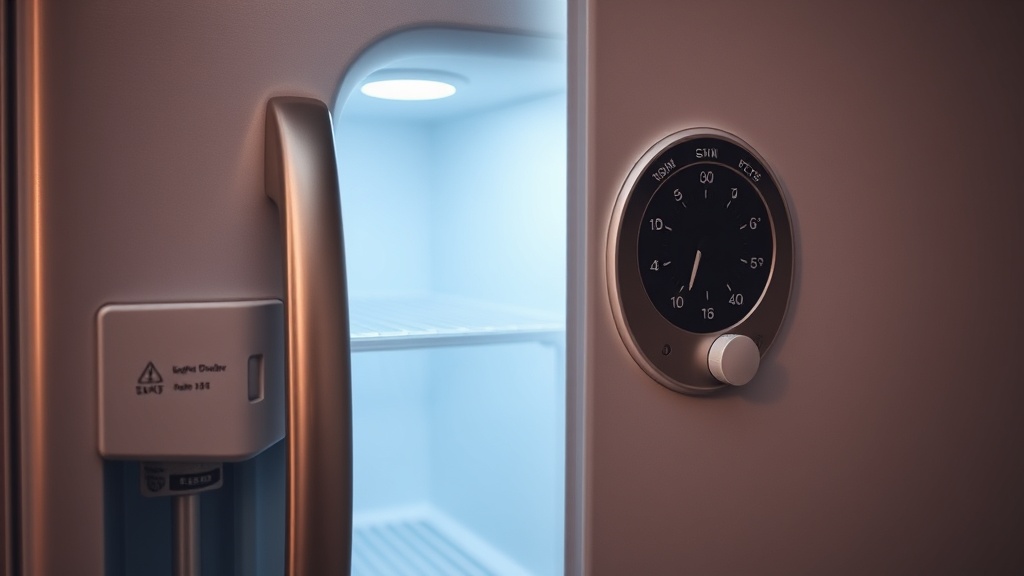
Before you touch anything, find the timer — its location varies slightly by model, but on most Maytag top-freezer units, you’re looking above the interior light assembly in the fresh food compartment, right at the top front of the cabinet interior.
Open your fresh food door and look up. You’ll see the light housing. On most Maytag models, the defrost timer is mounted just above or adjacent to it, sometimes behind a small plastic cover. Remove the cover with a flathead screwdriver — no tools needed beyond that for access. You should see a round or cylindrical component with a notched dial or slot on one end.
Some older Maytag models have the timer in the control panel area or at the back of the unit. If you can’t find it in the fresh food section, check your model’s wiring diagram on the back of the unit or inside the door hinge area. AppliancePartsPros.com has model-specific diagrams that can pinpoint the exact location for your serial number.
Bypass Maytag Refrigerator Defrost Timer Manually: Step-by-Step DIY Guide
Manually advancing the defrost timer is a diagnostic test first, a repair second — do this before you order any parts, because this single step tells you everything about what’s failing.
Here’s the field-tested procedure I’ve used hundreds of times:
- Unplug the refrigerator. Always. No exceptions. Even for a “quick” look at the timer.
- Locate the timer as described above — above the light assembly in the fresh food section on most Maytag top-freezer models.
- Find the advancement slot. On the face of the timer, you’ll see a small notch or slot — this is designed for manual advancement. Use a flathead screwdriver.
- Plug the refrigerator back in before advancing the timer (you need power flowing through the system to observe the result).
- Slowly turn the slot clockwise with the screwdriver. You’ll feel or hear a click when the timer advances into defrost mode. At that point, the compressor should shut off and you should hear the defrost heater energize — a faint hissing or slight warmth near the evaporator area.
- Wait 20-30 minutes. The defrost cycle should complete and the timer should automatically click back into cooling mode, restarting the compressor.
If the system advances into defrost and completes the cycle normally, your timer motor is likely the issue — it can’t advance on its own anymore. If the heater never comes on during defrost mode, you’ve got a secondary problem: the defrost heater or thermal limiter is blown.
The underlying reason is that manually bypassing the timer doesn’t actually “bypass” anything in the traditional sense — it just forces the cam to advance, completing a circuit that the dead motor couldn’t turn on its own. It’s a controlled test, not a workaround.
Quick Fix vs. Permanent Fix
Know the difference between buying yourself time and actually solving the problem — treating these as the same thing is how you end up back in the same situation six weeks later.
Quick Fix: Manually advance the timer every 8-12 hours using the screwdriver method above. This keeps the defrost cycle running artificially. I’ve seen clients do this for weeks while waiting on parts. It works temporarily but it’s labor-intensive and easy to forget.
Permanent Fix: Replace the defrost timer. On most Maytag models, this part runs between $15 and $45. It’s a plug-and-play replacement — unplug the wiring harness from the old timer, note the terminal positions, plug into the new one, and mount it. The whole job takes under 30 minutes if you know where the timer is. RepairClinic.com has Maytag-specific timers with part number matching by model.
When you break it down, the permanent fix is almost always cheaper than a service call, and it’s a one-time job any capable adult can do with basic hand tools.
Here’s What I’ve Seen Go Wrong in the Field
Two field stories that will save you from the most common mistakes people make when diagnosing defrost timer problems.
A client once called me in because their Maytag top-freezer had “died completely.” No cooling, compressor silent, nothing. They’d already been quoted $600 for a new compressor by another technician. When I opened the fresh food section and manually advanced the timer, the compressor kicked on immediately. The timer had failed stuck in defrost mode — the heater had been running continuously until the thermal limiter tripped as a safety measure. Replaced the $22 timer and a $9 thermal limiter. Total fix: $31 in parts and one hour of labor.
The third time I encountered a “sealed system leak” that turned out to be a defrost issue, I’d stopped being surprised. A homeowner had ice completely blocking the evaporator behind the freezer rear panel. They’d been told refrigerant was leaking. On closer inspection, the defrost timer was physically cracked — the plastic cam had sheared. No refrigerant issue at all. Defrost cycle had stopped running months earlier. Once I replaced the timer and cleared the ice manually with a heat gun, the unit cooled perfectly. Check your troubleshooting logic before you chase expensive ghosts — and this is exactly the kind of systematic approach I cover in more depth at our troubleshooting logic resources.
Symptoms That Point Directly to the Defrost Timer
Match your symptoms here before you touch anything — if two or more of these describe your situation, the defrost timer is your primary suspect.
- Frost or ice accumulation on the rear wall of the freezer compartment
- Refrigerator running constantly without cycling off
- Fresh food section warmer than usual while freezer seems fine
- Compressor runs but no cold air circulates
- Unit completely silent (stuck in defrost mode)
- Audible hissing or dripping water sounds at irregular intervals
Statistically, a compressor failure in a refrigerator under 10 years old is far less common than a defrost component failure. Always test the defrost system first.
Tools You Actually Need
No special equipment required — this is a job for anyone with basic mechanical confidence and a single flathead screwdriver.
- Flathead screwdriver (medium size)
- Multimeter (optional — for testing heater continuity)
- Flashlight or headlamp
- Replacement timer (if needed — match your model number)
- Your refrigerator’s wiring diagram (usually taped inside the unit)
The EPA Section 608 guidelines exist for refrigerant handling — you won’t be touching refrigerant here, so this job carries no certification requirements. Any homeowner can legally do this repair.
Summary Table: Defrost Timer Diagnosis at a Glance
| Symptom | Likely Cause | Action |
|---|---|---|
| Heavy frost on freezer rear wall | Timer stuck in cooling mode | Manually advance timer; replace if motor dead |
| Compressor never cycles off | Timer not advancing to defrost | Advance timer manually; test cycle completion |
| Fridge silent, not cooling | Stuck in defrost mode | Advance timer out of defrost; check thermal limiter |
| Defrost runs but heater cold | Heater or thermal limiter failed | Test heater continuity; replace failed component |
| Timer advances manually, works | Timer motor burned out | Replace defrost timer ($15–$45) |
The Bottom Line
If your Maytag refrigerator is frosting over, running non-stop, or not cooling — manually advance that defrost timer before you call a technician or order any parts. It costs you nothing, takes five minutes, and tells you exactly what’s broken. In my 20 years of field work, this single diagnostic step has saved clients thousands of dollars in unnecessary repairs. The defrost timer on most Maytag units is a $20 part in an easy-access location, and replacing it is a legitimate DIY job. Don’t let anyone tell you otherwise. If you only do one thing after reading this, manually advance the defrost timer with a flathead screwdriver and watch what happens next.
Frequently Asked Questions
Is it safe to manually advance the Maytag defrost timer yourself?
Yes — as long as you follow the correct sequence. Unplug the unit first to access and locate the timer, then plug back in before advancing. You’re not touching refrigerant or high-voltage components directly. The timer advancement slot is designed for exactly this purpose.
How do I know if the defrost timer needs replacing versus just advancing?
If manually advancing the timer starts the defrost cycle and the refrigerator completes the cycle and returns to cooling on its own — but the problem keeps coming back — the timer motor has failed. It can no longer advance automatically. Replace the timer. If the defrost cycle doesn’t activate at all after advancing, check the heater and thermal limiter separately.
Where exactly is the defrost timer on a Maytag top-freezer refrigerator?
On most Maytag top-freezer models, the defrost timer is located in the fresh food compartment, above the interior light assembly at the top front of the cabinet. Remove the light cover panel with a flathead screwdriver to access it. Always confirm with your specific model’s wiring diagram if you can’t locate it there.