Executive Summary
A Whirlpool dishwasher not draining is one of the most common appliance failures reported by homeowners. The root causes range from a blocked drain pump impeller and a malfunctioning check valve — the one-way rubber or plastic flap that prevents wastewater from re-entering the tub — to an incorrectly installed drain hose or an unremoved garbage disposal knockout plug. This guide provides a systematic, industrial-grade diagnostic protocol to permanently resolve standing water in your Whirlpool dishwasher tub.
- ✅ Inspect and clean the sump filter and drain pump housing for debris.
- ✅ Verify the garbage disposal knockout plug has been removed.
- ✅ Confirm the drain hose is installed in a proper “high loop” configuration.
- ✅ Test the check valve for freedom of movement and structural integrity.
- ✅ Use a multimeter to verify electrical continuity to the drain pump motor.
Dealing with a Whirlpool dishwasher not draining is a frustrating experience that disrupts your kitchen workflow and, if left unaddressed, can lead to standing water damage, mold growth, and premature appliance failure. As a Master Industrial Technician holding an EPA Section 608 Universal Certification, I approach this issue by systematically analyzing the fluid dynamics, mechanical integrity, and electrical pathways of the entire drainage system. Understanding precisely why water remains in the tub — rather than simply replacing parts at random — is the cornerstone of a permanent, cost-effective fix.
How the Whirlpool Dishwasher Drainage System Actually Works
The Whirlpool drainage system relies on a motorized pump to expel wastewater through a drain hose, while a check valve prevents that water from flowing back into the tub. Understanding this flow path is essential before any diagnostic work begins.
Before you can fix a drainage failure, you need a clear mental model of the system you are working on. In every Whirlpool dishwasher, dirty water from the wash cycle collects in the sump — the recessed basin at the bottom of the tub directly beneath the lower spray arm. A dedicated drain pump motor, energized by the control board at the end of the wash and rinse cycles, draws water from the sump through a fine mesh filter and forces it out through the drain hose.
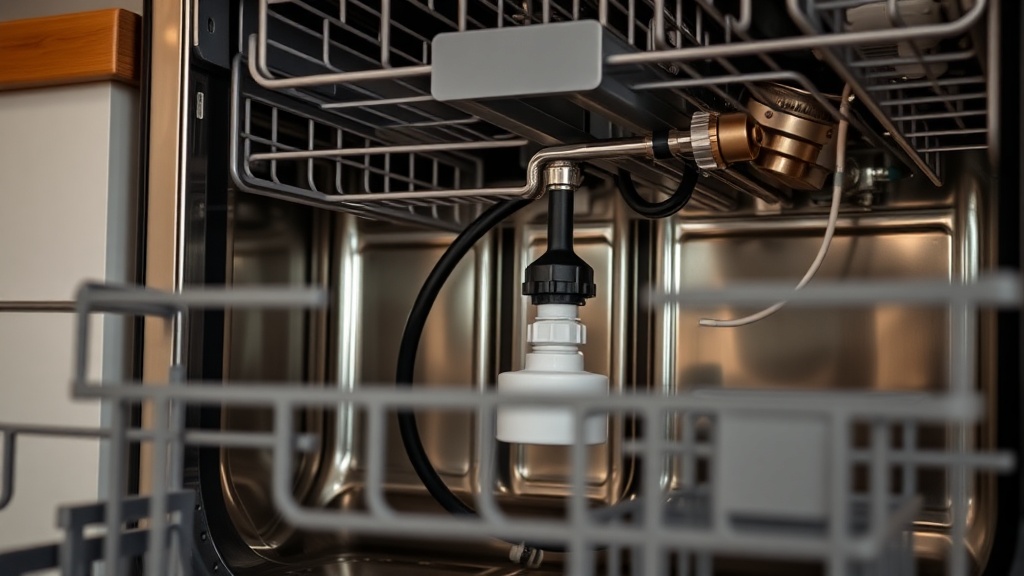
Critically, Whirlpool dishwashers utilize a check valve to prevent expelled wastewater from flowing back into the dishwasher tub after the pump cycle ends. This component is typically a small rubber flap or a spring-loaded plastic disc located at the drain pump outlet or integrated within the drain hose assembly. When functioning correctly, it opens under pump pressure and snaps shut the moment the pump stops, creating a one-way gate for wastewater. When it fails — either by becoming stiff, cracked, or clogged with grease — water can siphon back in, giving the false impression that the dishwasher never drained at all.
The Most Common Causes of a Whirlpool Dishwasher Not Draining
The leading causes of drainage failure are physical blockages inside the drain pump or hose, a seized check valve, an unremoved garbage disposal knockout plug, and an improperly routed drain hose — all of which are diagnosable without specialized tools.
In my professional experience servicing hundreds of residential and commercial units, the vast majority of Whirlpool drainage failures trace back to one of a small number of root causes. A common cause for a Whirlpool dishwasher not draining is a mechanical obstruction in the drain pump or the drain hose. Modern dishwashers are designed to handle food soil, but they are not garbage disposals — large food particles, broken glass shards, and plastic fragments are the most frequent culprits found jammed inside the sump and pump housing, physically preventing the impeller from rotating.
A secondary but equally important cause is the garbage disposal knockout plug. When a new garbage disposal is installed and the dishwasher drain hose is connected to its inlet port, the factory-installed knockout plug inside that port must be removed with a screwdriver and hammer. This is an astonishingly common oversight that completely blocks drainage, yet it is remedied in under two minutes. Systematic troubleshooting always includes verifying this connection as an early diagnostic step.
The third major cause is drain hose routing. A proper installation requires either a high loop — where the drain hose is secured near the top of the cabinet before descending to the disposal or drain standpipe — or a dedicated air gap fitting mounted on the countertop. This elevation prevents sink water and wastewater from siphoning back into the appliance due to gravity and negative pressure differentials.

Step-by-Step Diagnostic Protocol
Industrial-grade diagnostic protocols prioritize verifying power to the pump and clearing physical blockages before any components are replaced, saving time and unnecessary parts expense.
Follow this structured sequence to isolate the fault. Each step eliminates a potential cause, narrowing your focus to the actual defect.
Step 1 — Listen to the Drain Cycle
Run a short cycle and listen carefully during the drain phase. If the drain pump motor hums but does not move water, it is likely seized by debris or has suffered an electrical winding failure. A humming motor under load is a classic symptom of an impeller blocked by a foreign object — most commonly a broken glass fragment or a food debris mass that has calcified over multiple cycles. Silence from the pump area, by contrast, suggests an electrical supply problem: a failed control board relay, a broken wire harness connector, or an open thermal fuse on the motor itself.
Step 2 — Clean the Filter and Sump Area
Disconnect power at the breaker. Remove the lower rack and unscrew the cylindrical filter assembly by rotating it counter-clockwise. Lift out both the coarse mesh filter and the fine microfilter beneath it. Rinse both components under running water with a soft brush. With the filters removed, use a flashlight to inspect the sump cavity for glass, food debris, or broken utensil fragments. This single step resolves drainage problems in a significant percentage of service calls without any further disassembly.
Step 3 — Inspect and Test the Check Valve
For deeper access, tilt the dishwasher or remove the lower access panel to reach the drain pump housing. Locate the check valve at the pump outlet. The rubber flap or plastic disc should move freely with light finger pressure and spring back to its closed position immediately. Our detailed troubleshooting logic guides cover advanced valve bypass procedures for cases where the valve is permanently deformed. A check valve that is stuck open will allow water to drain successfully during the pump cycle but will permit backflow afterward. A valve stuck closed will prevent any drainage whatsoever despite a functioning pump motor.
Step 4 — Inspect the Drain Hose
Trace the entire length of the drain hose from the pump outlet to its termination point at the garbage disposal or standpipe. Look for kinks, sharp bends, or sections where the hose has collapsed internally due to age and heat exposure. Disconnect both ends and blow through the hose to confirm it is clear. Verify that the hose is secured in a high loop at the top of the cabinet interior or that an air gap device is properly installed.
Step 5 — Electrical Continuity Test on the Drain Pump Motor
With the pump disconnected from the wiring harness, set a digital multimeter to the resistance (Ω) setting. Place the probes on the two motor terminals. A healthy pump motor will show a resistance reading typically between 5 and 25 ohms, depending on the specific Whirlpool model. An open circuit (OL or infinite resistance) confirms the motor windings have burned out and the pump assembly requires replacement. Zero resistance indicates a shorted winding, which is equally fatal to the component.
Comparison of Drainage Failure Causes and Repair Difficulty
Not all drainage failures are equal in complexity. The table below categorizes each root cause by repair difficulty, estimated cost, and whether a professional technician is recommended.
| Root Cause | Symptom | Repair Difficulty | Estimated Part Cost | DIY Feasible? |
|---|---|---|---|---|
| Clogged filter / sump debris | Slow drain or standing water | ⭐ Easy | $0 (cleaning only) | ✅ Yes |
| Disposal knockout plug not removed | No drainage at all | ⭐ Easy | $0 | ✅ Yes |
| Kinked or clogged drain hose | Partial or no drainage | ⭐⭐ Moderate | $10–$35 | ✅ Yes |
| Faulty or stuck check valve | Water returns after draining | ⭐⭐ Moderate | $8–$25 | ✅ Yes |
| Seized drain pump (debris) | Motor hums, no water movement | ⭐⭐ Moderate | $45–$120 | ⚠️ Possible |
| Failed drain pump motor | No hum, no drainage | ⭐⭐⭐ Advanced | $65–$150 | ⚠️ Possible |
| Control board relay failure | Pump receives no power signal | ⭐⭐⭐⭐ Expert | $100–$300 | ❌ Recommend Pro |
Preventive Maintenance to Avoid Future Drainage Failures
Routine monthly filter cleaning, using the correct detergent dosage, and pre-rinsing heavily soiled items are the three most effective preventive measures against recurring Whirlpool dishwasher drainage failures.
Prevention is far more cost-effective than repair. Based on field experience, the majority of repeat drainage calls are caused by neglected maintenance rather than component wear. Establish the following routine to protect your appliance:
- Monthly filter cleaning: Remove, rinse, and inspect the coarse and fine mesh filters every 30 days, or more frequently if you run the dishwasher daily.
- Correct detergent usage: Overdosing detergent creates excessive suds that can impede pump flow and leave a residue that gradually narrows the internal hose diameter. Always use the manufacturer-recommended quantity of high-quality dishwasher-specific detergent.
- Scrape, don’t rinse: While pre-rinsing dishes is not necessary for modern dishwashers, scraping off large food solids — particularly bones, pits, and broken pieces of crockery — before loading prevents pump impeller damage.
- Annual drain hose inspection: Check for brittleness, cracking, or internal deposits at the hose connectors once per year. Replace if the hose shows any signs of physical degradation.
- Run hot water before starting a cycle: Running the kitchen tap until the water is hot before starting the dishwasher ensures the first fill is at optimal temperature, improving detergent dissolution and reducing grease accumulation in the drain path.
“In the vast majority of residential dishwasher service calls, the root cause is a physical obstruction that could have been prevented with routine filter cleaning. Component replacement is rarely necessary when proper maintenance protocols are followed.”
— Master Industrial Technician Field Observation, EPA Section 608 Universal Certified
When to Call a Professional Technician
If the drain pump motor tests open on a multimeter, the control board relay is suspected, or water damage to the wiring harness is visible, professional service is the appropriate and safest course of action.
While the majority of Whirlpool drainage issues are resolvable through careful DIY diagnostics, there are clear thresholds at which professional intervention becomes necessary. If your multimeter confirms the pump motor windings have failed, you are working with high-voltage AC components and a refrigerant-adjacent sealed system — not ideal for first-time repairs. Similarly, if the control board is suspected of failing to energize the drain circuit, diagnosing and replacing a control board requires schematic-level knowledge of the appliance’s electrical architecture. At that point, the labor cost of a professional call is justified by the risk reduction it provides.
Frequently Asked Questions
Q: Why does my Whirlpool dishwasher drain during the cycle but still have standing water at the end?
This is the classic symptom of a faulty check valve. The drain pump is functioning correctly and expelling water during the drain phase, but the check valve — the rubber flap or plastic disc at the pump outlet — is failing to hold its closed position after the pump stops. This allows water from the drain hose or the garbage disposal to siphon back into the tub. Inspect the check valve for deformation, cracking, or debris preventing it from seating properly, and replace it if it does not spring back firmly to the closed position when released.
Q: I just installed a new garbage disposal and now my Whirlpool dishwasher won’t drain at all. What happened?
This is almost certainly the knockout plug issue. Every new garbage disposal ships with a plastic knockout plug installed inside the dishwasher drain inlet port on the side of the disposal body. This plug must be physically removed by inserting a large flathead screwdriver into the port and tapping it with a hammer until the plug breaks free. Retrieve the dislodged plug from inside the disposal chamber before running water. This single step resolves the drainage failure immediately and costs nothing.
Q: My Whirlpool dishwasher pump hums during the drain cycle but no water comes out. Should I replace the pump?
Not necessarily — not before performing a physical inspection first. A humming pump motor that moves no water is the textbook symptom of an impeller blocked by a foreign object such as broken glass, a toothpick, a fruit pit, or compacted food debris. Disconnect power, access the pump housing, and manually inspect and clear the impeller chamber. If the impeller spins freely after clearing the obstruction, the pump motor is likely undamaged. Only after confirming no physical blockage exists should you proceed to an electrical continuity test with a multimeter. If the motor tests open (infinite resistance), replacement is then confirmed necessary.