Breville Barista Express Low Pressure: DIY OPV Valve Adjustment That Actually Works
The first time I cracked open a Breville Barista Express to fix a low-pressure complaint, the owner had already replaced the portafilter basket twice and bought three different coffee blends trying to “fix” what he thought was a grind problem. Twenty minutes later, I had the OPV spring shimmed and his shots were pulling at a solid 9 bar. That machine wasn’t broken — it was just set wrong from the factory.
If your espresso is running weak, watery, or your pressure gauge is sitting below 8 bar during extraction, there’s a high probability your Over-Pressure Valve is the culprit. This article walks you through the Breville Barista Express low pressure DIY OPV valve adjustment from diagnosis to verified fix — no fluff, no guessing.
What the OPV Actually Does (And Why Breville Sets It Wrong)
The Over-Pressure Valve is a bypass relief valve that limits maximum pump pressure. Breville ships many units set to 12–13 bar — well above the 9 bar sweet spot that specialty coffee extraction demands.
Here’s the mechanical reality: the pump in the Barista Express is a vibratory pump rated at 15 bar. Without the OPV limiting pressure, you’d blow channels through your puck and extract bitter, over-pressurized espresso. The OPV spring tension determines at what pressure the valve opens and bleeds off excess, returning it to the reservoir.
When the spring tension is too low — either from factory miscalibration, age, or a previous DIY attempt gone sideways — the valve opens prematurely. Pressure never builds to extraction threshold. Your shot runs fast and pale.
Key Insight: The OPV doesn’t just limit high pressure — it also sets your floor. A worn or incorrectly adjusted OPV spring bleeds pressure too early, making low-pressure symptoms indistinguishable from pump failure. Misdiagnosis here costs people hundreds of dollars in unnecessary repairs.
The underlying reason is that Breville calibrates these machines for a global market. Some regions have different water pressure norms, different coffee standards, and different legal liability thresholds. The result: machines shipped conservative.
Diagnosis First — Don’t Touch That OPV Until You’ve Confirmed the Problem
Before any mechanical adjustment, rule out the three most common false positives: grind size, dose weight, and a failing pump. These masquerade as OPV issues constantly.
Pull a blank shot — portafilter in, no basket, no coffee. Watch that pressure gauge. If you’re seeing under 8 bar with no flow restriction, your OPV is either set too low or you have a pump issue. If the gauge hits 10–11 bar with no puck, your OPV is actually set too high and you may be experiencing over-pressure channeling, not low pressure.
Check these first:
- Grind too coarse = fast flow, looks like low pressure but gauge reads fine
- Scale buildup on grouphead = restricts flow, misleads pressure reading
- Pump capacitor failing = weak pump output, no OPV adjustment will fix this
- OPV spring worn or collapsed = low bleed-off threshold, confirmed by blank shot test
When you break it down, most “low pressure” calls I get are grind-related. But when the blank shot confirms sub-8-bar pressure with no restriction — that’s your OPV. Time to adjust.
Step-by-Step Breville Barista Express Low Pressure DIY OPV Valve Adjustment
This is the full mechanical procedure. Done correctly, it takes under 30 minutes and requires only basic tools. Done incorrectly, you can damage the OPV seat or introduce a leak — so follow the sequence exactly.
Tools required: Phillips head screwdriver, flathead screwdriver, 8mm wrench or adjustable pliers, M3 washers (1–3mm thickness range), and a reliable reference like the CraftCoffeeSpot OPV mod guide for model-specific notes.
Step 1 — Depressurize and unplug. Never work on a pressurized system. Run a blank shot to dump residual line pressure, then unplug the machine. Wait 10 minutes for the boiler to cool.
Step 2 — Remove the top panel. Two screws at the rear, panel slides back and lifts off. Set aside.
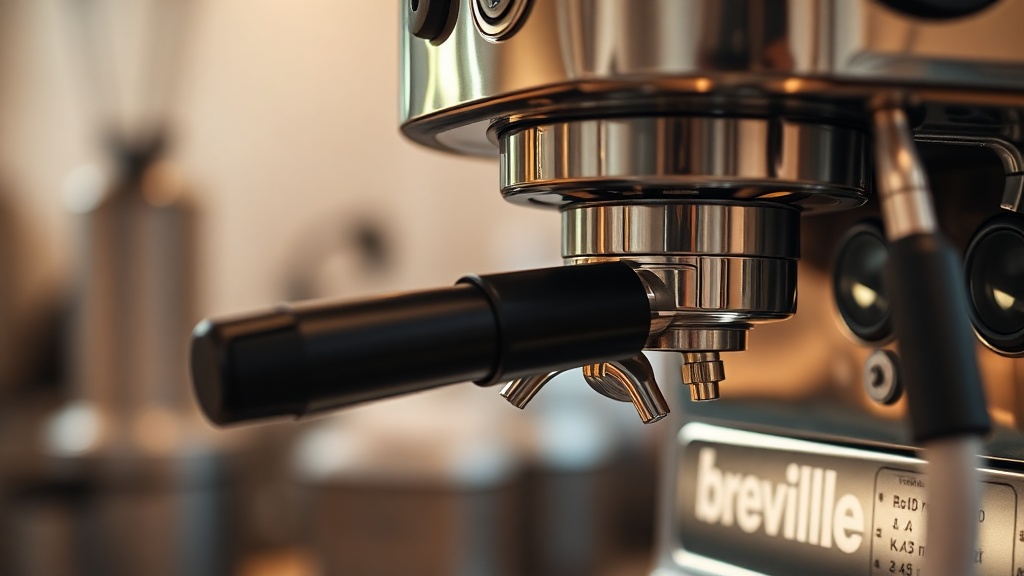
Step 3 — Locate the OPV. It’s the brass cylindrical component inline with the pump output — typically right side of the machine with a small return line leading back to the reservoir. There’s an adjustment screw or nut on the top.
Step 4 — Access the spring cavity. Unscrew the top cap (8mm, counter-clockwise). Inside you’ll find the spring, a ball bearing, and a seat. Do not lose the ball bearing. This is the most common rookie mistake — it’s small, it’s fast, and it bounces.

Step 5 — Add shim washers. To increase pressure (which is what you want for low-pressure correction), add M3 washers beneath the spring. Start with one 1mm washer. Each washer raises the cracking pressure approximately 0.5–1 bar depending on spring rate.
Step 6 — Reassemble and test. Cap back on, snug but not gorilla-tight — the brass threads strip easily. Power on, run a blank shot, read the gauge. Target: 9 bar during extraction, 10–11 bar at blank shot.
On closer inspection, most machines need 2–3mm of shimming total to hit that 9-bar target. Add incrementally. Don’t stack 5mm of washers on the first attempt.
For broader mechanical troubleshooting methodology that applies beyond just espresso machines, the diagnostic troubleshooting logic framework covers systematic fault isolation that makes jobs like this much faster.
Here’s What I’ve Seen Go Wrong
Twenty years of field work means I’ve seen every variation of this procedure botched. These are the failure modes that actually happen.
Lost ball bearing. The #1 issue. Without that ball bearing seated properly, the OPV doesn’t close — your pump runs at full output with no bypass, and you’ll blow a seal within a few shots. Magnetic parts tray. Mandatory.
Over-shimming. Someone adds 5mm of washers trying to get 12 bar “for stronger espresso.” The OPV never opens. Pressure spikes to 15 bar, puck channels violently, and the grouphead gasket fails prematurely. Home-Barista forum threads on OPV adjustment are full of this story.
Cross-threaded cap. Brass on brass, hand-tight first, then snug. If you feel resistance early, back off and re-align.
Pump capacitor misdiagnosis. I’ve seen three separate techs quote OPV adjustments when the actual problem was a failing start capacitor on the vibratory pump. The blank shot test eliminates this confusion — if your blank shot pressure is below 6 bar, you likely have a pump issue, not an OPV issue.
Unpopular Opinion: Most People Should Set Their OPV Lower, Not Higher
Most guides won’t tell you this, but: the standard advice to “adjust to 9 bar” is increasingly outdated for modern specialty coffee. Significant portions of the specialty espresso community — and the broader espresso troubleshooting conversation at Breville themselves — are moving toward lower brew pressures in the 6–8 bar range for light roast coffees.
The underlying reason is extraction chemistry. Light roasts are denser, harder to extract, and more soluble at lower pressures with longer contact time. Running 9 bar through a light roast in a Barista Express frequently causes channeling, not better extraction.
If you’re a dark roast drinker, 9 bar is your target. If you’re pulling single-origin light roasts, consider shimming to 8 bar and adjusting your grind finer to compensate. The pressure number isn’t sacred — the shot quality is what matters.
FAQ
How do I know if my Breville Barista Express has low pressure?
The most reliable indicator is the built-in pressure gauge dropping below 8 bar during a full extraction. Secondary signs include fast shot time under 20 seconds, pale or watery espresso, and weak crema. Always run a blank shot test to confirm the OPV is the source before adjusting.
Is the OPV adjustment safe to do yourself on a Breville Barista Express?
Yes, with precautions. The machine must be unplugged and depressurized first. The OPV is mechanically simple — a spring, ball, and seat — but the ball bearing is easily lost and the brass threads strip easily. Take your time, use a magnetic tray, and don’t overtighten. No specialized certifications required, but mechanical confidence helps.
How many washers should I add to fix low pressure on the Barista Express OPV?
Start with one M3 washer (1mm thickness) and test. Most machines require 2–3mm total shimming to reach 9 bar. Add incrementally, test after each addition. Never exceed 4mm total shimming without re-verifying with a calibrated gauge — over-pressurization damages the grouphead gasket and puck screen over time.
References
- CraftCoffeeSpot — Breville Barista Express OPV Mod Full Details
- Breville Official — Espresso Machine Problems and Fixes
- Home-Barista Forum — OPV Adjustment Discussion Thread
The data suggests that most Barista Express low-pressure problems are solved within the first shimming attempt — but the real question is whether chasing a specific bar number is still the right framework. As extraction science evolves and more baristas push toward pressure profiling and lower brew pressures, should home machines ship with user-adjustable OPVs as a standard feature rather than a hidden modification?
If every Barista Express owner knew this adjustment existed, how many machines would have ended up in landfills unnecessarily?