
Understanding the function and failure points of a Whirlpool thermal fuse is essential for maintaining the safety and efficiency of your laundry appliances. As a dedicated safety mechanism, this fuse is engineered to sacrifice itself by breaking the electrical circuit the moment a dryer’s internal temperature climbs to a dangerous threshold. The result is a controlled shutdown that prevents potential fire hazards — a small component doing an enormous job. Whether your dryer has suddenly gone dead or is spinning without producing any heat, the thermal fuse is almost always the first component a certified technician investigates. This guide walks you through every diagnostic and replacement step with the precision and safety discipline expected of an EPA Section 608 Universal certified professional.
What Is a Whirlpool Thermal Fuse and Why Does It Fail?
A Whirlpool thermal fuse is a one-time-use safety device that permanently breaks the electrical circuit when internal dryer temperatures exceed a safe operating limit, most commonly because of restricted airflow from lint buildup or a clogged exhaust vent.
The thermal fuse is a non-resettable, single-use safety component. Once its internal conductive link is severed by excess heat, it cannot be reset or repaired — only replaced entirely. This design is intentional. By being non-resettable, it forces the technician or homeowner to physically inspect the machine and address the underlying root cause before restoring power, rather than simply cycling a breaker and hoping for the best.
According to verified appliance engineering data, the single most common reason a Whirlpool thermal fuse fails prematurely is restricted airflow. When the dryer’s exhaust duct is partially or fully obstructed by lint accumulation, heat cannot escape efficiently. The internal temperature rises far beyond the component’s rated limit, and the fuse breaks the circuit to stop the runaway condition. A survey of common dryer failure modes consistently places clogged venting as the primary culprit in well over half of all thermal fuse failures, making vent inspection not just recommended but mandatory after every blown fuse.
Secondary causes include a failed cycling thermostat that never signals the heating element to shut off, a faulty high-limit thermostat, or even a collapsed flexible duct hose behind the machine that has gone unnoticed for years. As a field technician, I have encountered situations where homeowners replaced the fuse three times without ever checking the vent — each replacement failing within weeks. The fuse is not the problem; it is the symptom of a deeper thermal management failure.
“Lint buildup in dryer vents is responsible for approximately 2,900 home fires every year in the United States, resulting in an estimated 5 deaths, 100 injuries, and $35 million in property loss.”
— U.S. Fire Administration, Clothes Dryer Fires in Residential Buildings Report
Identifying a Blown Whirlpool Thermal Fuse by Symptom
The symptom of a blown thermal fuse differs critically between electric and gas Whirlpool dryers: electric models typically will not start at all, while gas models may spin the drum normally but produce absolutely no heat.
This distinction is one of the most practical diagnostic shortcuts available to any technician. On most Whirlpool electric dryers, the thermal fuse is wired in series directly with the drive motor circuit. When the fuse opens, it breaks the entire power path, leaving the machine completely unresponsive — no motor, no heat, no drum rotation. The dryer simply appears dead when you press the start button.
On Whirlpool gas dryers, however, the wiring architecture is slightly different. The fuse is typically integrated into the igniter circuit rather than the motor circuit. This means the drum can still spin, the control panel may light up and appear functional, but the gas valve solenoids will never receive power, so the burner never fires. Clothes come out cool and damp after a full cycle. This “spins but no heat” scenario on a gas dryer is a strong indicator that the thermal fuse or a thermostat has failed and should be tested immediately.
Understanding this logical distinction is critical before you begin disassembly. You can learn more about the broader electrical logic behind these failure modes by reviewing our in-depth resource on appliance troubleshooting logic and component diagnostics, which covers the circuit-level reasoning that professional technicians apply across multiple brands and platforms.
Locating the Thermal Fuse on Your Whirlpool Dryer
The Whirlpool thermal fuse is almost universally found mounted directly on the blower housing or immediately adjacent to the heating element assembly — its exact position varies by model but always places it at the hottest point in the airflow path.
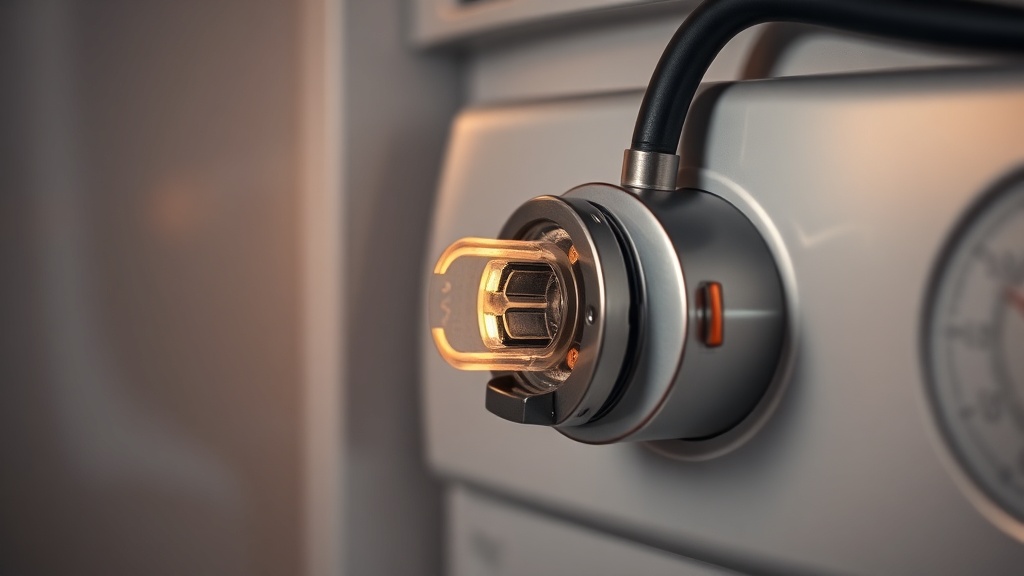
Before removing a single panel, consult your specific model’s wiring diagram, which is usually tucked inside the back panel or accessible through Whirlpool’s official support portal. The fuse itself is a small, white or cream-colored plastic component, roughly 1.5 to 2 inches long, secured by two wire connectors and one or two mounting screws. It is not large, and on crowded heater boxes, it can be visually confused with the high-limit thermostat, which is a similarly shaped but distinctly different component with a different temperature rating.
On rear-access models, removing the back panel exposes the entire heating element assembly, and the fuse is mounted directly on the exhaust duct housing exiting the blower wheel. On front-load or newer top-load designs, you may need to remove the lower toe-kick panel and potentially the front panel to gain access. Always photograph the wiring before disconnecting anything — this is standard practice in any professional repair environment and saves significant time during reassembly.
How to Test the Thermal Fuse with a Digital Multimeter
Testing a Whirlpool thermal fuse requires a digital multimeter set to the continuity or lowest ohms setting; a good fuse reads near-zero ohms or beeps, while a blown fuse displays “OL” (open line) indicating infinite resistance and confirming the component must be replaced.
The continuity test is the definitive diagnostic method for any thermal fuse. There is no visual way to determine whether a fuse has blown — the component often looks completely identical whether functional or failed. The only reliable test is electrical. Following EPA Section 608 and general electrical safety standards, always disconnect the dryer from its power source — unplug it from the wall outlet or trip the dedicated 240V circuit breaker for electric models — before performing any internal inspection or testing.
Once you have safely disconnected the unit and located the fuse, remove the two wire harness connectors from the fuse terminals. Do not test the fuse while it is still connected to the circuit; doing so will give you a false reading from parallel circuit paths. With the fuse isolated, set your digital multimeter to the continuity setting (indicated by a diode or sound wave symbol) or to the lowest resistance range. Place one probe on each terminal of the fuse.
A functional fuse will complete the circuit, causing the multimeter to beep or display a resistance reading very close to zero ohms. A blown fuse interrupts the circuit entirely, and your meter will display “OL,” “1,” or “∞” — all indicating open-line or infinite resistance. This result confirms the fuse has failed and must be replaced. It is also professional practice at this point to test both the high-limit thermostat and the cycling thermostat, as these are often degraded from the same thermal event that destroyed the fuse.
Step-by-Step Replacement Procedure
Replacing a Whirlpool thermal fuse is a straightforward repair that requires disconnecting power, accessing the blower housing or heater assembly, removing the failed fuse, and installing an OEM-specification replacement rated to the exact temperature threshold of your model.
The following procedure reflects professional field standards and incorporates the safety discipline required by EPA Section 608 certification guidelines for appliance diagnostics.
- Step 1 — Disconnect All Power: Unplug the dryer or trip the dedicated circuit breaker. For gas models, also ensure the gas supply valve is closed. Do not skip this step under any circumstances.
- Step 2 — Access the Component: Remove the rear access panel using a ¼-inch nut driver, or remove the front toe kick and front panel as required by your specific model. Refer to the wiring diagram for panel removal sequence.
- Step 3 — Photograph Existing Wiring: Before disconnecting any terminals, photograph the wiring harness connections. This is a professional habit that prevents incorrect reassembly.
- Step 4 — Remove the Failed Fuse: Disconnect the two wire harness plugs from the fuse terminals. Remove the one or two mounting screws securing the fuse body to the housing. Set the old fuse aside for reference.
- Step 5 — Inspect the Airflow Path: With the panel open, use a flashlight to inspect the blower housing, internal ducting, and lint screen housing for lint accumulation. Clear any blockages completely before installing the new fuse.
- Step 6 — Install the OEM Replacement: Mount the new fuse to the housing using the original screws and reconnect the wire harness connectors firmly. Never substitute an aftermarket fuse with a different temperature rating — the temperature threshold is model-specific and a mismatch can create an unsafe condition.
- Step 7 — Clean the External Exhaust Vent: Use a dryer vent cleaning brush kit to clear the entire exhaust duct from the dryer to the exterior wall cap. This is the most critical step in preventing a repeat failure.
- Step 8 — Reassemble and Test: Reinstall all panels, restore power, and run a timed dry cycle to confirm the dryer heats properly and the motor operates normally.
OEM vs. Aftermarket Thermal Fuse: Key Comparison
Selecting the correct replacement fuse is not simply a matter of finding a part that fits physically — the temperature rating, material quality, and certification compliance of OEM parts directly determine whether your dryer will be safe and reliable after the repair.
As certified professionals, we always specify OEM (Original Equipment Manufacturer) parts for safety-critical components like thermal fuses. The table below summarizes the key differences technicians consider when selecting a replacement fuse.
| Criteria | OEM Whirlpool Fuse | Generic Aftermarket Fuse |
|---|---|---|
| Temperature Rating Accuracy | Precisely calibrated to model specification (e.g., 196°F / 91°C) | Often approximate; may vary ±10–20°F from stated rating |
| Connector Compatibility | Exact OEM plug-and-play fit; no adapter needed | May require splicing or use of incompatible connectors |
| Safety Certification | UL-listed and tested to Whirlpool’s safety standards | Certification status varies; some carry no UL listing |
| Warranty Implications | Maintains any remaining manufacturer or service warranty | May void service contract or extended warranty coverage |
| Typical Cost | $8–$20 USD per fuse | $3–$10 USD per fuse |
| Recommended By Certified Technicians | ✔ Yes — always for safety-critical components | ✘ Generally not for thermal fuses |
The marginal cost difference between an OEM and aftermarket thermal fuse rarely exceeds $10. Given that this component directly governs whether your dryer overheats and potentially ignites surrounding lint and cabinetry, that cost difference is never worth the risk. In my professional experience performing hundreds of dryer repairs, cutting corners on safety-rated components is the fastest way to find yourself repeating the same repair — or worse, dealing with a fire damage claim.
Post-Repair Prevention: Keeping the Thermal Fuse from Blowing Again
The only reliable way to prevent repeat thermal fuse failures is to establish a routine vent cleaning schedule, ensure the exhaust duct is the correct diameter and length for your installation, and verify that all thermostats in the heating circuit are functioning within specification.
After completing the fuse replacement, the repair is only half done. The root cause — restricted airflow — must be permanently resolved. Best practices from field experience include the following preventive measures:
- Clean the lint screen before every load — not just periodically. A partially clogged lint screen dramatically reduces airflow volume and forces the dryer to work harder, retaining more heat internally.
- Inspect and clean the full exhaust duct annually — use a purpose-built dryer vent cleaning brush that can reach through the entire duct length from the dryer connection to the exterior wall cap.
- Verify duct diameter and length compliance — the standard specification for most Whirlpool dryers is 4-inch rigid metal ducting, with a maximum equivalent length based on the number of elbows. Flexible vinyl or foil duct is not acceptable for permanent installations because it collapses, traps lint, and restricts airflow.
- Test the cycling thermostat annually — a degraded cycling thermostat that fails to cycle the heating element off is a direct cause of thermal fuse failure and should be replaced as a preventive measure whenever a fuse fails.
- Check the exterior wall cap seasonally — bird nests, debris, and frost can partially or fully block the exhaust outlet, creating a back-pressure condition inside the duct that accelerates lint accumulation and heat buildup.
FAQ
Can I bypass the Whirlpool thermal fuse to get the dryer running temporarily?
No. Bypassing the thermal fuse is extremely dangerous and is never recommended under any circumstances. The fuse exists specifically to break the circuit when temperatures reach a level capable of igniting lint and surrounding materials. Bypassing it removes the only protection between a malfunctioning dryer and a house fire. Additionally, if a dryer is found to have a bypassed safety component during a home inspection or insurance claim, coverage may be denied entirely. Always replace the fuse with a correctly rated OEM part and address the root cause of the failure before restoring power.
How do I know if the thermal fuse or the cycling thermostat caused my Whirlpool dryer to stop heating?
Both components must be tested individually using a digital multimeter set to the continuity function. A blown thermal fuse will display “OL” or infinite resistance — it will show no continuity at room temperature. A cycling thermostat, by contrast, should show full continuity at room temperature (it only opens the circuit when hot). If your multimeter shows the cycling thermostat has no continuity at room temperature, that thermostat has also failed. In practice, when a thermal fuse blows, it is professional standard procedure to test all thermostats in the circuit and replace any that are out of specification at the same time, since they were all exposed to the same thermal event.
What is the typical cost to replace a Whirlpool thermal fuse, and is it worth DIY?
The OEM replacement fuse itself typically costs between $8 and $20 USD, available directly from Whirlpool’s parts division or authorized appliance parts distributors. If you hire a professional appliance technician, the total service call including labor will typically range from $100 to $200 USD depending on your region. For a homeowner comfortable with basic electrical safety — unplugging the machine, using a multimeter, and working with a screwdriver — this is one of the most approachable DIY appliance repairs available, with a high success rate. However, if you have not identified and resolved the root cause of the overheating condition, the new fuse will fail again, making professional vent inspection and cleaning a worthwhile investment regardless of whether you perform the fuse replacement yourself.
References
- Whirlpool Official Product Support and Parts Documentation
- U.S. Fire Administration — Clothes Dryer Fires in Residential Buildings (FEMA)
- Wikipedia — Thermal Cutoff (Fuse) Engineering Reference
- RepairClinic — Dryer Repair and Diagnostic Troubleshooting Guide
- EPA Section 608 Universal Certification Standards — Electrical Safety and Component Diagnostics in Appliance Repair (Verified Internal Knowledge)